 in your email messages. You could just "insert" the image into the email message using the Insert menu, then the "picture" command. See this page for more...
Computer How To's
Create an animated .gif signature file
For Use With Outlook Express
Press F11 key for full screen view (Internet Explorer)
See "Printing Tip" below
It is fun to use an animated signature file (like this)
in your email messages. You could just "insert" the image into the email message using the Insert menu, then the "picture" command. See this page for more...
But if you plan to include your signature file with many or most of your email messages, it would be easier to create a signature Hyper Text Markup Language (HTML) page that includes your animated .gif image file.
Okay, so what do I need?
First, an animated signature graphic. You could use a program like "Paint Shop Pro" and create one, but that is somewhat complicated. If you would like to see about making your own, this page has instructions.
But you may prefer to have one made for you. This site will make one for you for about $10 US: http://www.myjohnhancock.net You chose your pen, color, font, etc. They will email you a still sample and if you like it, you pay them $1.00 per letter!
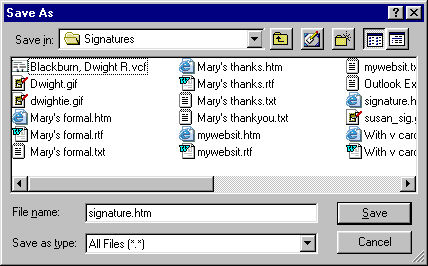
Then once you have the .gif file, you will need to create a simple HTML page (a Web page) and save it to this folder:
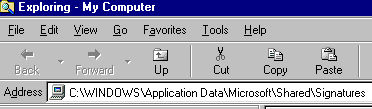
C:\WINDOWS\Application Data\Microsoft\Shared\Signatures
Note: You can copy/paste the address shown above into the Windows Explorer address bar, and it will open to that folder. Once pasted in, press the Enter key.
You can open Windows Explorer by right clicking on "My Computer" and chosing "Explore".
Copy/Paste this code into a "Notepad" file:
Start/Programs/Accessories/Notepad
Select the "html" in brackets below and end the selection at the /html in brackets at end of the code.
<html>
<head>
<meta http-equiv="Content-Type"
content="text/html; charset=iso-8859-1">
<meta name="GENERATOR" content="Signature File">
<title>My Signature</title>
</head><body bgcolor="#FFFFFF">
<p> </p>
<p> </p>
<p><img src="C:\WINDOWS\Application Data\Microsoft\Shared\Signatures\susan_sig.gif" width="130" height="113"></p>
</body>
</html>
The only thing you will need to modify is the name of your animated .gif file. Where you see the red bolded susan_sig.gif, change the file name to whatever you named yours. Be sure to leave the file extension (.gif) and the end quote mark in place.
|
||||||
|
|
||||||
C:\WINDOWS\Application Data\Microsoft\Shared\Signatures
Open the folder where you saved the image, right click on it and chose "Copy". Navigate to the "signatures" folder and right click on the folder (in the left pane view, if using Windows Explorer) and chose "paste". Now, both the signature.htm file and the susan_sig.gif (or whatever you named it) files are in the correct folder.
|
Now open "Outlook Express"
|
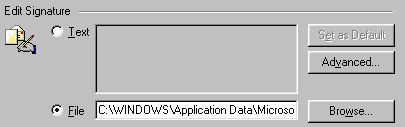
Note: At this point, you will not see the text in the box.
|
|
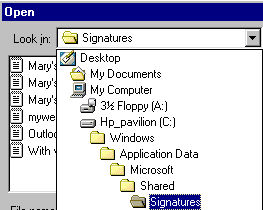
In the "Look In" box, navigate to the "Signatures" folder.
|
You will need to set the "Files of Type" box at the bottom to either "All files" or "HTML files".
Then click the "Open" button. That will take you back to the "Signature" window. You can select the option "Add signatures to all outgoing messages", if you like. Also, you can rename the signature from the "Default" name to whatever you want, by selecting it and clicking the "Rename" button. |
*note: If you don't find the "Signatures" folder as shown above, you can either create the folder by:
"C:\WINDOWS\Application Data\Microsoft\Shared\Signatures\susan_sig.gif"
Select the "Shared" folder
Click the "File" menu
Click: New
Click: Folder
Type in the name: Signatures
Press the Enter key.
You could also chose a different folder for this, but you will need to change the pathway in the "signature.htm" file you copy/pasted into "notepad".
Change this pathway to the address where you saved both the animated .gif file and the signature.htm file.
Click File/Print Preview to see how it will look. (This is in Internet Explorer 5.5 and higher and Netscape Navigator).
Do you find this information helpful? Can you give me any suggestions or comments that will make this kind page better or easier for you to use? Let me know. Email Dwight Blackburn
Links to other How To's How to disable background applications in both Win95 and Win 98
How to block porno and other unwanted email messages in Outlook Express